English
 中文简体
中文简体 Español
Content
- 1 Why Low Elastic Edge Wrapping Line Becomes a Common Material in Fabric Edge Wrapping Processes
- 2 Key Points for Controlling Flatness of Low Elastic Edge Wrapping Line in Garment Neckline Edge Wrapping
- 3 Comparative Analysis of Adaptability Between Low Elastic Edge Wrapping Line and High Elastic Edge Wrapping Line for Knitted Fabrics
- 4 Threading Process and Tension Adjustment of Low Elastic Edge Wrapping Line for Household Sewing Machines
- 5 Abrasion Resistance Test Methods for Low Elastic Edge Wrapping Line in Outdoor Tent Fabric Edge Wrapping
- 6 Control of Washing Shrinkage Rate and Anti-Deformation Measures for Low Elastic Edge Wrapping Line
Why Low Elastic Edge Wrapping Line Becomes a Common Material in Fabric Edge Wrapping Processes
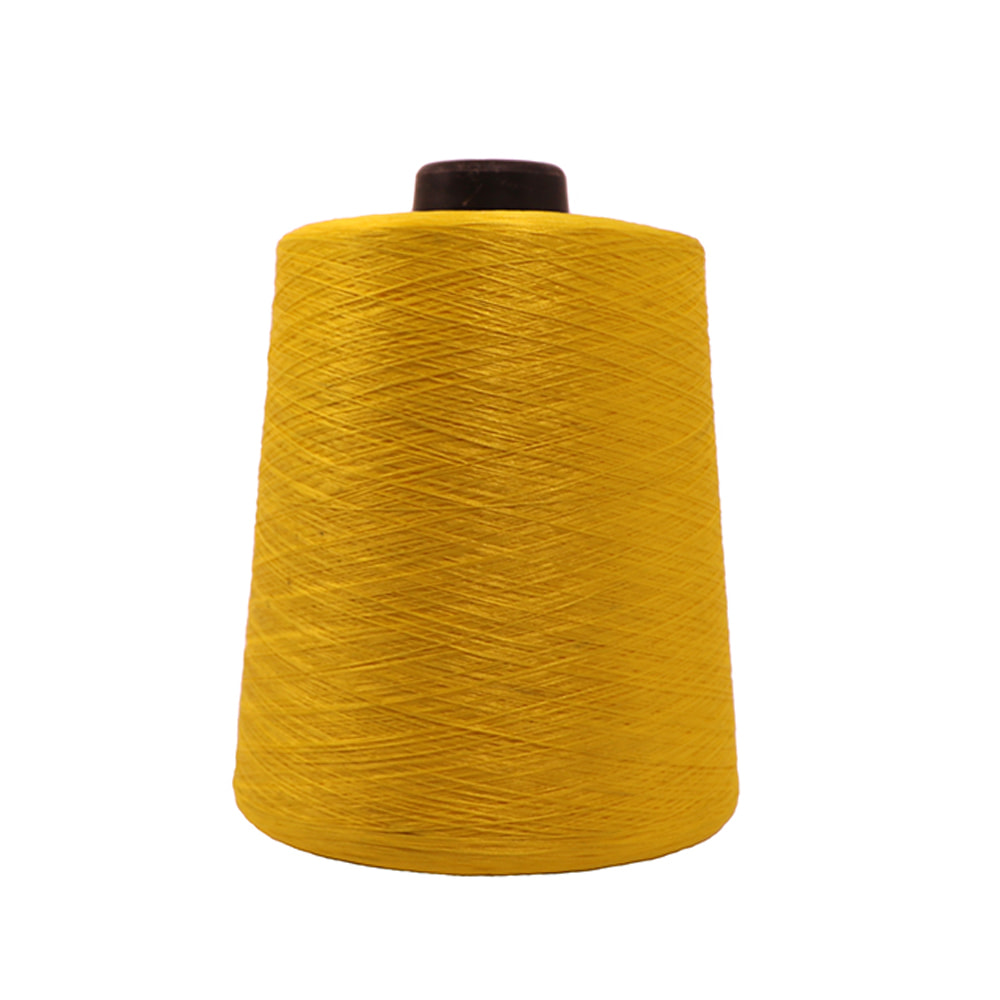
In scenarios involving fabric edge treatment—such as garment manufacturing, home textile production, and outdoor equipment processing—low elastic edge wrapping line has emerged as a mainstream choice for edge wrapping processes, thanks to its moderate elasticity and stable performance. Its core advantage lies in “controllable elasticity”: the elastic elongation rate of low elastic edge wrapping line is usually controlled between 15% and 25%. Unlike non-elastic thread, which lacks ductility and tends to break at curved fabric edges, or high elastic thread, which can cause edge wrapping to wrinkle and deform due to excessive elasticity, low elastic line strikes a balanced middle ground. This characteristic allows it to adapt to a variety of fabric types: for knitted fabrics, its low elasticity can deform in sync with the slight stretching of the fabric, preventing a tight, restrictive feeling at the wrapped edges; for woven fabrics (such as cotton cloth and canvas), its stable elasticity ensures straight, neat edge wrapping lines, avoiding looseness caused by fabric shrinkage over time. Additionally, most low elastic edge wrapping lines are made of polyester or polyester-cotton blended materials, boasting excellent wear resistance and color fastness. They do not fade or break easily after repeated washing, and their service life is 2 to 3 times that of ordinary cotton thread. In terms of process adaptability, it is compatible with various equipment such as flat sewing machines and overlock machines, producing neat and aesthetically pleasing stitches without the need for frequent adjustments to equipment parameters. Therefore, it has become an ideal alternative to high elastic thread and non-elastic thread in scenarios where both edge wrapping firmness and visual aesthetics need to be balanced.
Key Points for Controlling Flatness of Low Elastic Edge Wrapping Line in Garment Neckline Edge Wrapping
The flatness of garment necklines—especially those of knitted sweaters and T-shirts—directly affects wearing comfort and overall appearance. When using low elastic edge wrapping line for neckline edge wrapping, multiple links need to be carefully controlled to ensure top-tier process quality. The first critical step is setting the stitch density: adjust the stitch length according to the thickness of the neckline fabric. For thin knitted fabrics (such as ice silk and lightweight cotton), a stitch length of 3 to 3.5 stitches per centimeter is recommended, while for thicker fabrics (such as sweatshirt terry cloth), it should be adjusted to 2.5 to 3 stitches per centimeter. Excessively dense stitches can cause the fabric to pucker and wrinkle, while overly sparse stitches may lead to loose, unstable edge wrapping that easily comes undone. The second key point is controlling the edge wrapping width: the width of the neckline edge wrapping should be uniformly 0.8 to 1.2 centimeters. To ensure consistency, a positioning block can be installed on the sewing machine, which acts as a guide to maintain a steady distance between the edge line and the fabric edge during sewing. When wrapping the edge, the fabric edge should be folded inward twice—first folding 0.4 centimeters to seal the raw edge, then folding another 0.6 centimeters to form a neat edge. After folding, iron the fabric at a low temperature (80-100℃) to set the shape firmly, then sew with low elastic edge wrapping line. This pre-ironing step prevents edge wrapping skewing caused by irregular folding. Tension adjustment is also crucial: the upper thread tension of the sewing machine should be adjusted according to the thickness of the low elastic line. For fine low elastic line (marked as 40s/2), set the tension to 3 to 4 levels; for thicker line (marked as 20s/2), set it to 5 to 6 levels. The bobbin thread tension should be balanced with the upper thread tension—if the tension is too high, the edge wrapping will pull tight and distort the fabric; if too low, the stitches will be loose and messy. During sewing, the fabric should be fed at a constant, steady speed without pulling or forcing it. Particularly for curved necklines, the fabric should be rotated slowly and gently to ensure that the low elastic edge wrapping line fits naturally along the curve, with no accumulation of thread or unsightly stretching marks.
Comparative Analysis of Adaptability Between Low Elastic Edge Wrapping Line and High Elastic Edge Wrapping Line for Knitted Fabrics
The difference in adaptability between low elastic edge wrapping line and high elastic edge wrapping line when used on knitted fabrics is mainly reflected in elasticity matching and final process effects, requiring careful selection based on fabric characteristics and specific usage scenarios. In terms of elasticity matching, low elastic edge wrapping line—with an elongation rate of 15% to 25%—is ideal for knitted fabrics with moderate elasticity, such as ordinary cotton knitted fabrics and polyester-cotton knitted fabrics. After edge wrapping, it can stretch slightly in sync with the fabric during daily wear, neither restricting the wearer’s movement nor causing the edge wrapping to crack due to insufficient elasticity. High elastic edge wrapping line, by contrast, has an elongation rate of 40% to 60% and is more suitable for high-elasticity fabrics like spandex knitted fabrics and sports performance fabrics. It can stretch significantly along with the fabric without breaking, but when used on ordinary knitted fabrics, it is prone to causing necklines, cuffs, and other wrapped edges to bulge and deform due to excessive, unneeded elasticity. In terms of process effects, the stitches created with low elastic edge wrapping line are much flatter and smoother, and the fabric edges after edge wrapping are less likely to develop wrinkles—making it perfect for garments that pursue a simple, neat style, such as basic T-shirts and casual shirts. The stitches of high elastic edge wrapping line have a certain degree of contractility, allowing them to fit the fabric more tightly after edge wrapping, but this requires extremely precise tension control; otherwise, uneven stitches and unsightly bulges may occur. In terms of durability, low elastic edge wrapping line contains a relatively low proportion of elastic fibers (usually 5% to 10% spandex), resulting in a washing shrinkage rate of only 2% to 3%. This means it maintains its shape well during long-term wear and repeated washes. High elastic edge wrapping line, however, has a high spandex content (15% to 20%), leading to a washing shrinkage rate of 5% to 8%. If pre-shrinking treatment is not performed before use, it may cause the edge wrapping to shorten, pulling the fabric and creating wrinkles.
Threading Process and Tension Adjustment of Low Elastic Edge Wrapping Line for Household Sewing Machines
When using low elastic edge wrapping line on a household sewing machine, following the correct threading process and making precise tension adjustments are key to avoiding common stitch faults like skipped stitches, loose threads, or tight, distorted fabric. The threading process should follow a “step-by-step” principle to ensure the line runs smoothly through the machine: first, place the thread spool in the spool holder, making sure the spool rotates freely without jamming or catching. Next, guide the thread into the thread hole located on the top of the sewing machine, then wrap it around the tension adjustment knob—taking care to ensure the thread is fully embedded between the tension discs, as this ensures even tension throughout the sewing process. After that, pass the thread through the take-up lever (a small, lever-like component that controls thread feed) and then through the small thread guide holes leading to the needle. When threading the needle itself, always insert the thread from the front of the needle and leave a 3 to 5 centimeter tail of thread to prevent it from slipping out during the first few stitches. Tension adjustment needs to be carried out separately for the “upper thread” and “bobbin thread” to achieve balance: the upper thread tension is adjusted using the top tension knob on the sewing machine. When sewing thin fabrics, turn the knob to level 1 or 2 (lower tension) to prevent the fabric from wrinkling under too much pull; when sewing thick fabrics, adjust it to level 3 or 4 (higher tension) to ensure the stitches are tight and secure. If you notice the upper thread is loose and the bobbin thread is showing on the top of the fabric, gently turn the tension knob clockwise to increase tension; if the upper thread is too tight and pulling the fabric, turn it counterclockwise to loosen. Adjusting the bobbin thread tension requires opening the bobbin case (the small case that holds the bobbin): there is a tiny screw on the bobbin case that controls tension—turning it clockwise tightens the screw and increases tension, while turning it counterclockwise loosens it and decreases tension. A simple way to check if the bobbin tension is correct is to hold the end of the bobbin thread and lift the bobbin case lightly; under normal tension, the bobbin case should fall slowly, at a rate of 10 to 15 centimeters per second. If it falls too quickly, the tension is too low; if it barely falls, the tension is too high. After completing the threading and tension adjustment, it is always a good idea to test-sew on a piece of waste fabric first. This allows you to check if the stitches are flat, if there are any skipped stitches, and if the edge wrapping looks neat—only when everything is confirmed correct should you start formal sewing on your actual project.
Abrasion Resistance Test Methods for Low Elastic Edge Wrapping Line in Outdoor Tent Fabric Edge Wrapping
The edge wrapping of outdoor tent fabrics—such as durable Oxford cloth and water-resistant PVC-coated cloth—needs to withstand frequent friction, from setting up and taking down the tent to being dragged over the ground or against other surfaces. Therefore, the abrasion resistance of low elastic edge wrapping line used for tent edges must be verified through standardized tests to ensure long-term durability. A commonly used test method is the “reciprocating friction test”: start by preparing a sample of the tent fabric, cut to a size of 20 centimeters by 10 centimeters. Use low elastic edge wrapping line to wrap the edge of the sample according to the actual production process, with a standard edge wrapping width of 1.5 centimeters. Secure the fabric sample firmly on the platform of a friction testing machine, then select a friction head made of the same material that the tent will commonly come into contact with—usually canvas, to simulate real-world conditions. Set the friction pressure to 500 grams (a standard weight that mimics typical tension on tent edges), the friction speed to 30 cycles per minute, and the total number of reciprocating friction cycles to 500 (equivalent to multiple seasons of tent use). After the test is complete, carefully inspect the condition of the low elastic edge wrapping line: if the stitches remain intact without breaking, if wear is only limited to the surface fibers (with no white threads showing through, which would indicate core damage), and if the edge wrapping remains tight and does not loosen from the fabric, the line’s abrasion resistance is considered qualified. If the test reveals broken stitches or cracked edge wrapping, it is necessary to replace the low elastic line with a thicker, more durable version—such as line marked as 21s/3—or choose a low elastic line blended with wear-resistant fibers like nylon. Another important test is the “dynamic friction test,” which simulates the friction the tent experiences when being moved or dragged. To perform this test, fix the edge-wrapped tent fabric sample on a rotating drum with a diameter of 30 centimeters. Wrap the surface of the drum with 120-grit sandpaper (to mimic rough ground or rocky surfaces) and set the drum to rotate at 60 revolutions per minute. Let the drum run for 30 minutes, then stop and examine the low elastic edge wrapping line. The qualified standard is that the line shows no obvious wear,and the edge wrapping remains firmly bonded to the fabric with no signs of separation. Additionally, it is essential to test the abrasion resistance after washing, as outdoor tents may get wet or need cleaning. Wash the fabric sample according to standard tent care guidelines—using 30℃ water and a neutral detergent—then dry it and repeat the friction tests. This ensures that the low elastic edge wrapping line maintains its abrasion resistance in both dry and damp conditions, a critical requirement for outdoor gear.
Control of Washing Shrinkage Rate and Anti-Deformation Measures for Low Elastic Edge Wrapping Line
If the shrinkage rate of low elastic edge wrapping line is too high after washing, it can cause the wrapped fabric to wrinkle, shrink in size, or even become unwearable. To prevent this, comprehensive control measures must be implemented across three stages: pre-treatment, sewing process, and post-finishing. In the pre-treatment stage, the low elastic edge wrapping line itself should undergo pre-shrinking treatment to minimize subsequent shrinkage. This process involves soaking the line in warm water (30-40℃) for 30 minutes, adding a small amount of neutral detergent to simulate real washing conditions. Gently squeeze the line to ensure it is fully saturated, then remove it and air-dry it naturally (avoid direct sunlight, which can damage elastic fibers). This pre-shrinking step reduces the line’s potential shrinkage rate from 5%-8% to just 2%-3%, effectively preventing edge wrapping deformation caused by washing later. During the sewing process, it is crucial to match the shrinkage rate of the low elastic line with that of the fabric. When selecting materials, choose a fabric whose shrinkage rate is similar to that of the line—ideally within a ±1% range. For fabrics with naturally high shrinkage rates, such as pure cotton fabrics, pre-shrink the fabric as well before sewing: soak it in warm water, air-dry it, and then iron it to set its size. This reduces the difference in shrinkage between the line and the fabric, preventing the edge wrapping from becoming loose or tight after washing. The post-finishing stage focuses on controlling washing parameters to protect the low elastic edge wrapping line. When washing items with low elastic edge wrapping, always use water at a temperature no higher than 30℃—hot water above 40℃ accelerates the shrinkage of elastic fibers in the line. Select the “gentle” or “delicate” wash cycle on the washing machine to avoid strong agitation, which can stretch or break the line’s stitches. When drying, lay the item flat to air-dry instead of hanging it—hanging can cause the edge wrapping to stretch under the item’s weight, leading to deformation. If minor shrinkage or wrinkling occurs after washing, you can use a low-temperature iron (set to 80-120℃, depending on the fabric type) to restore the edge wrapping’s flatness. Always place a thin cotton cloth between the iron and the low elastic line to prevent direct heat from melting or discoloring the line. This ironing step not only smooths out wrinkles but also further stabilizes the line’s size, reducing the risk of future shrinkage.